Register with Stripe here.
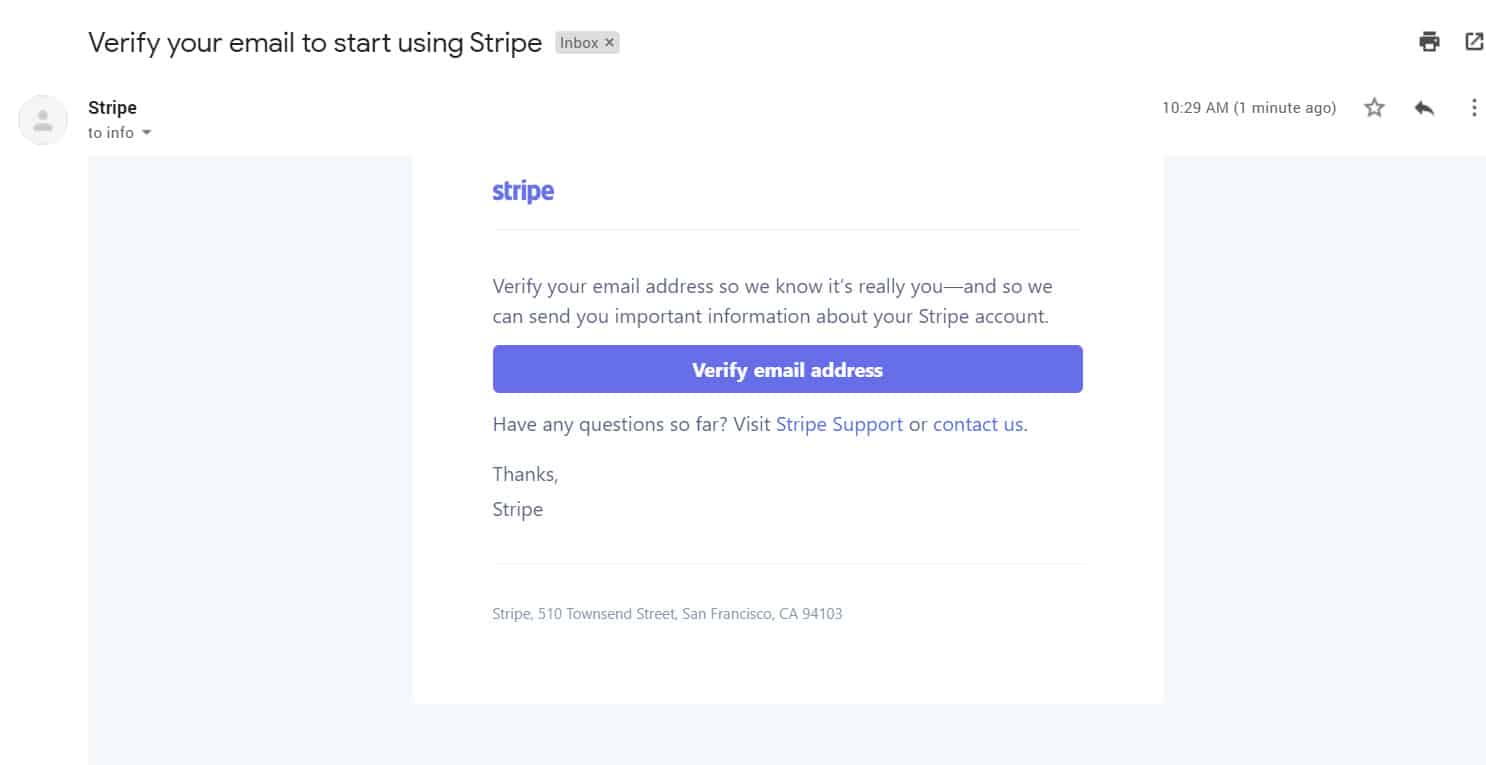
Visit your inbox and verify your email address.

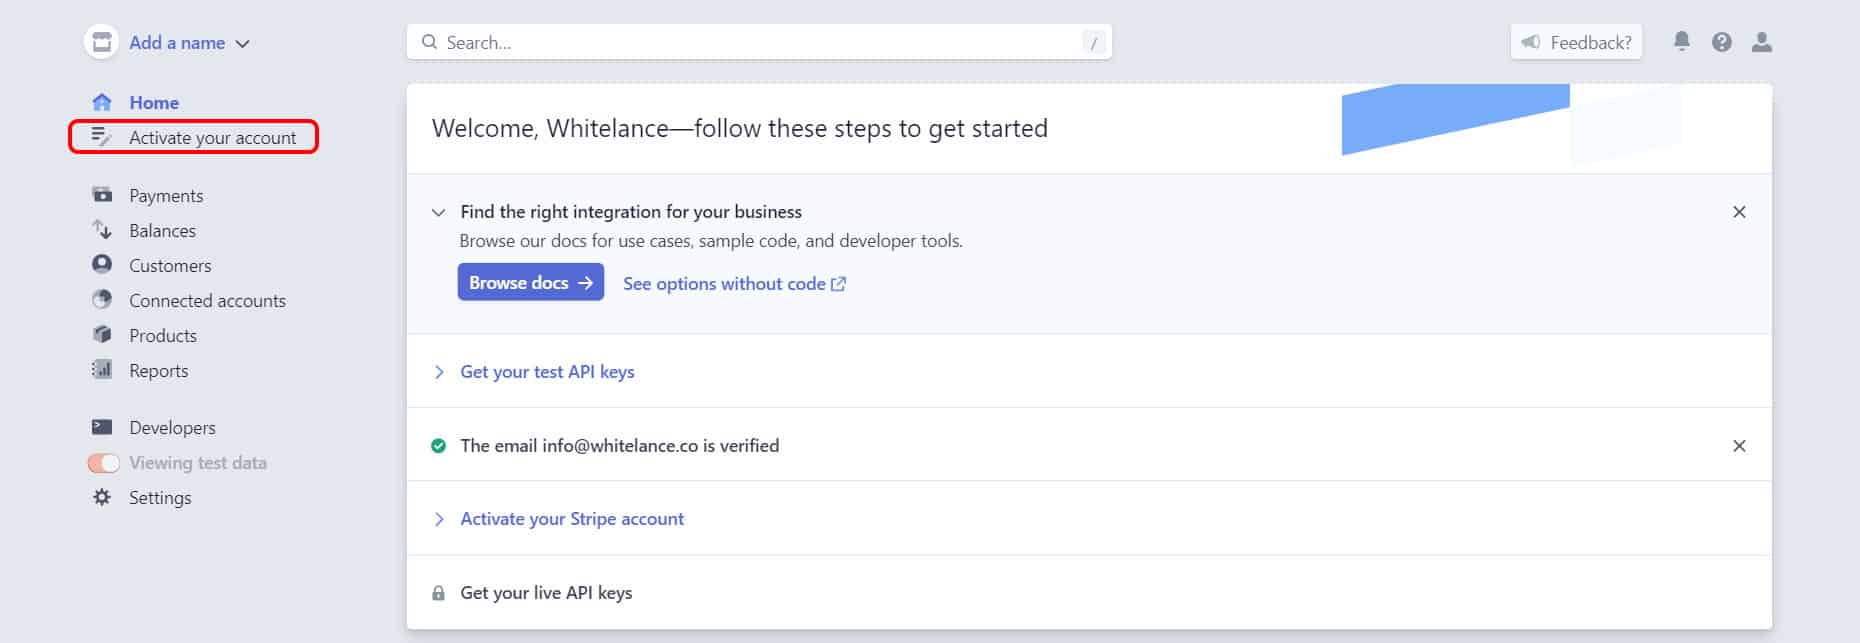
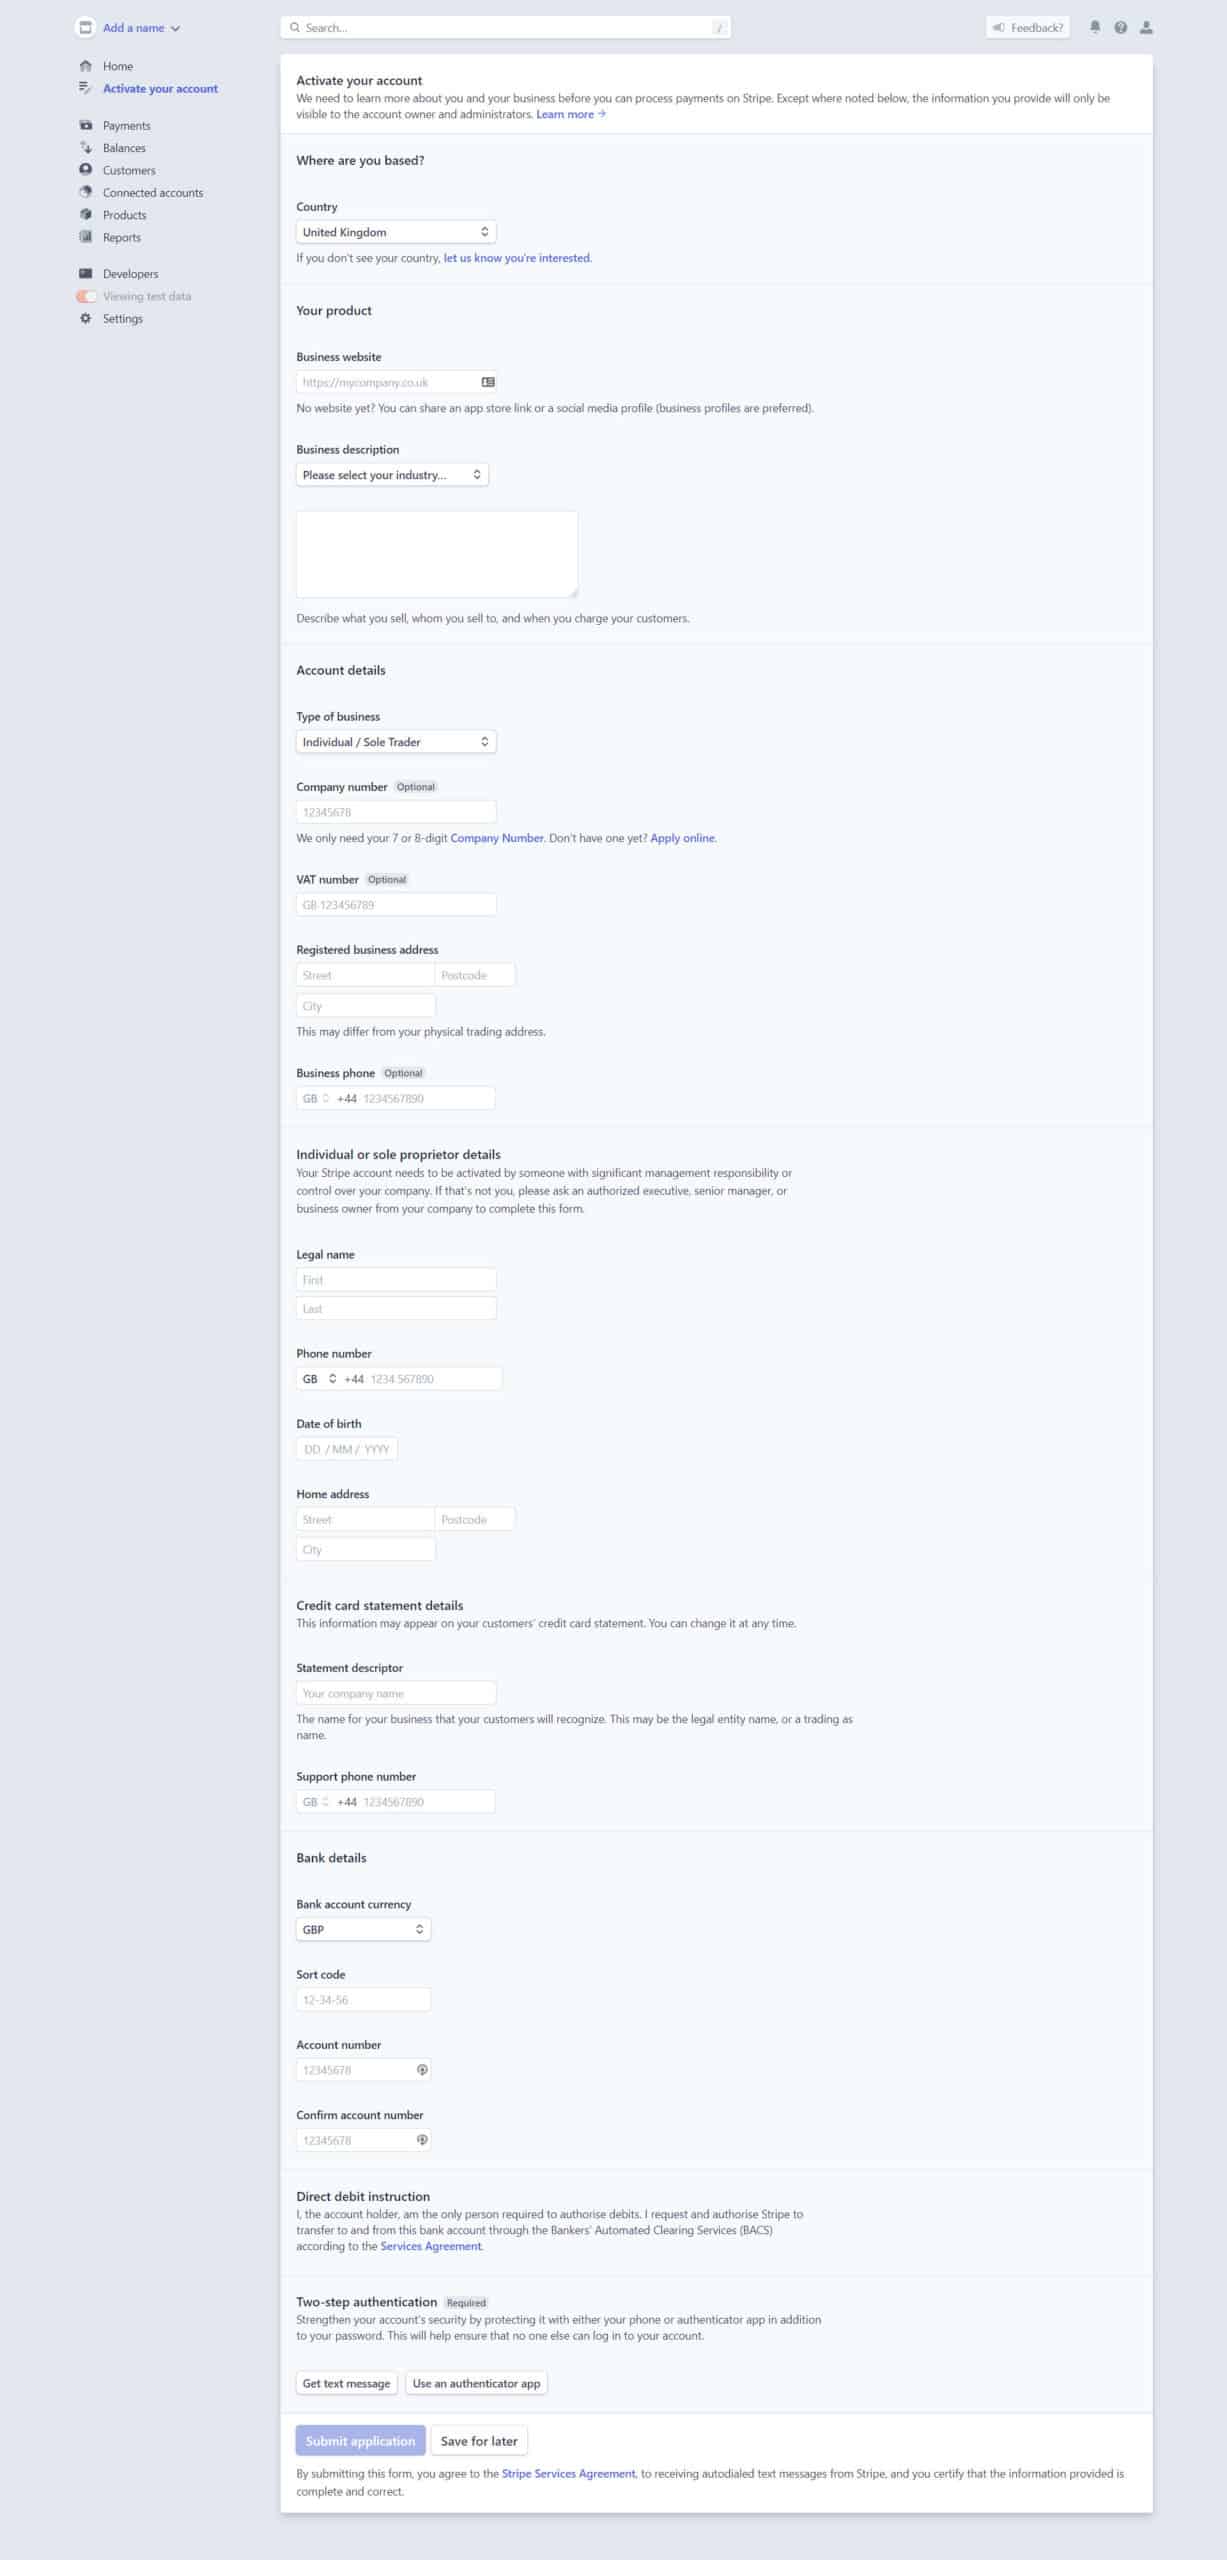
Activate your Account
Here’s the full list of info you’ll have to provide:
Set up Stripe Connect
Go to the settings gear icon on the top right:

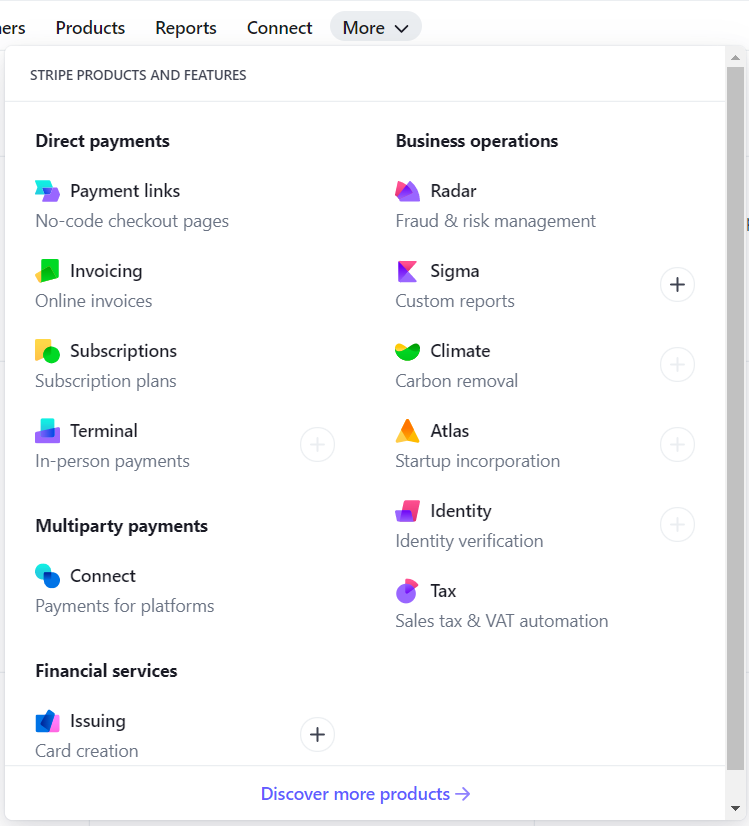
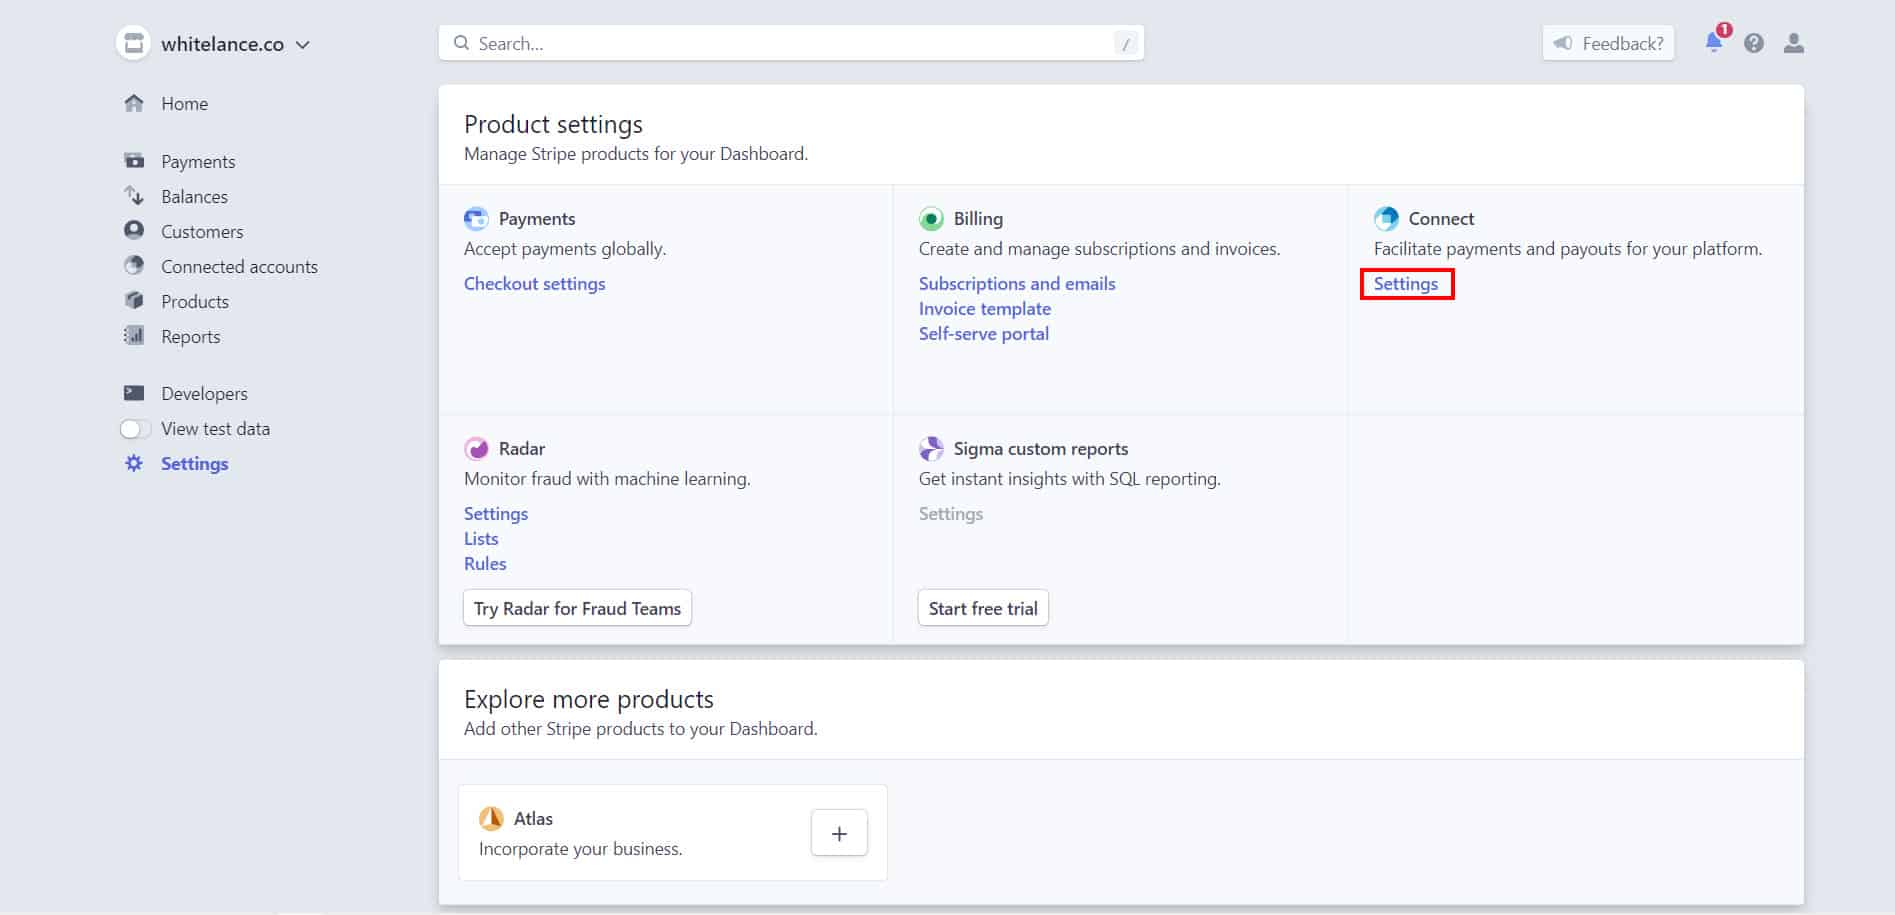
Click on ‘More’, then click on ‘Connect’:
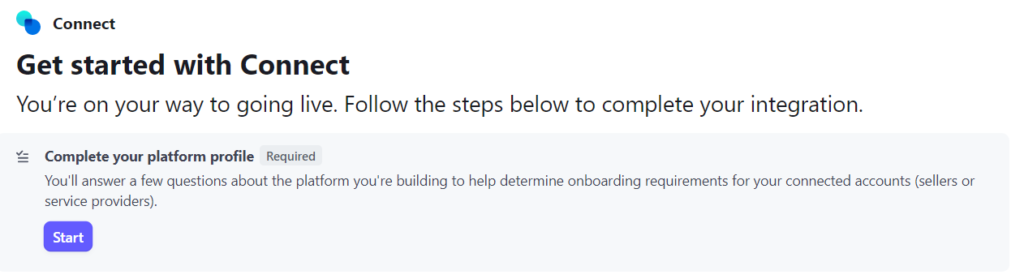
There’s a ‘Get Started with Connect’ section. Click ‘Complete your platform profile’:
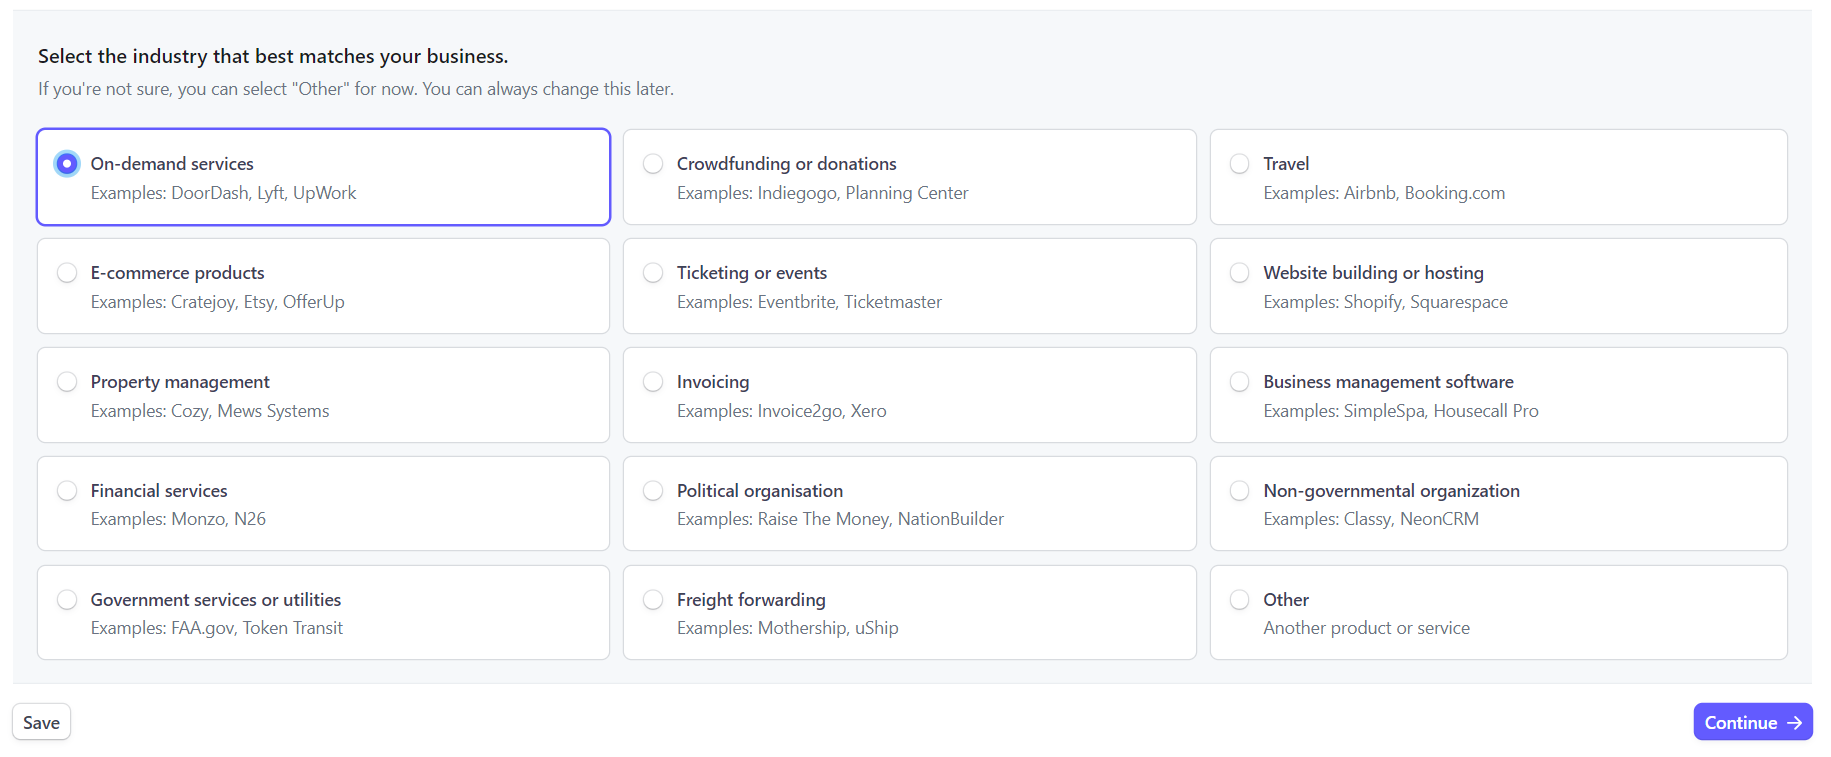
A. When Stripe asks you what you are building, for most users, the correct option is ‘On Demand Services’:
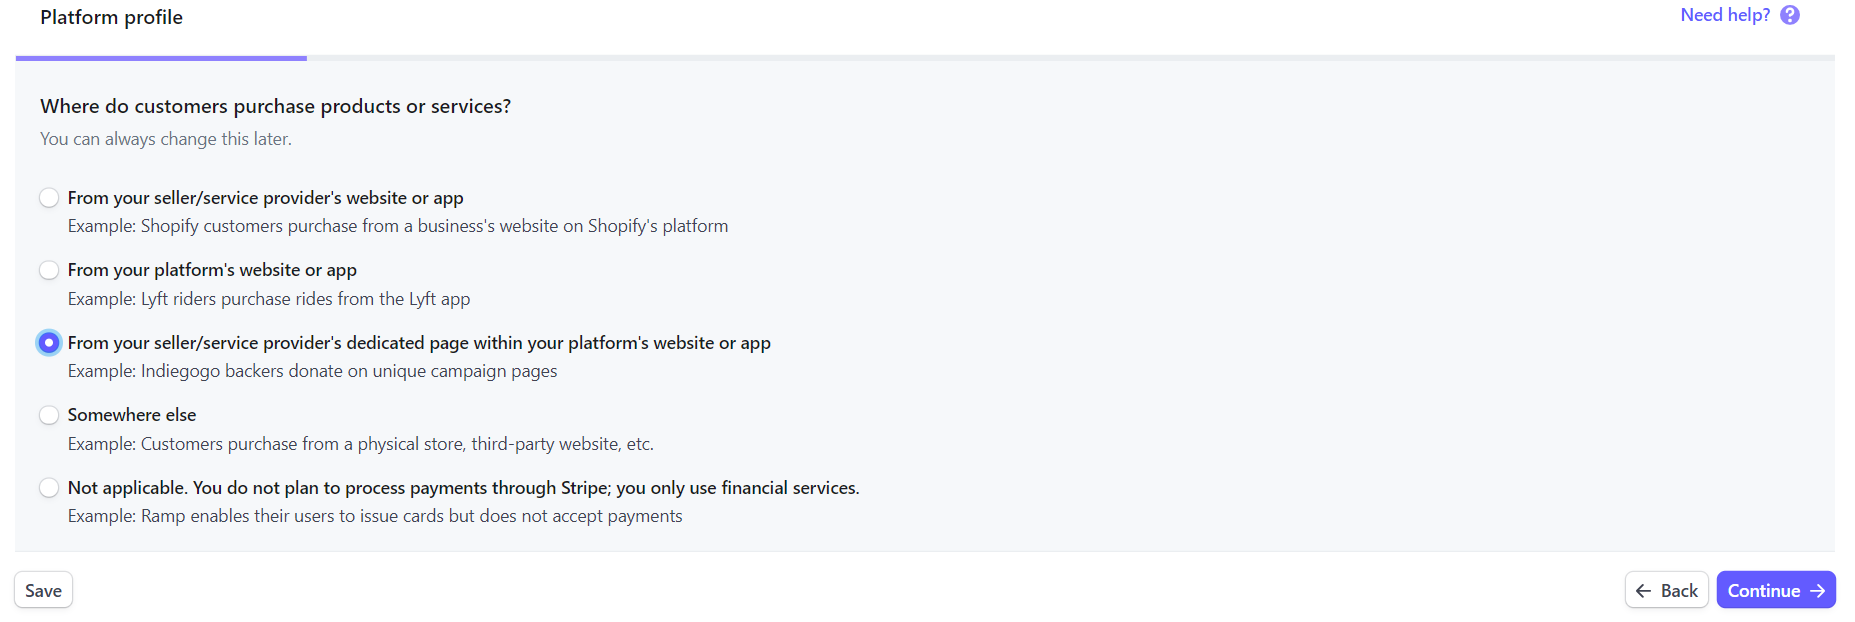
B. Next, select ‘From your Seller’s dedicated page’. We base this on the way Customer’s purchase ‘services’ from Freelancers via the direct contract with the Freelancer:
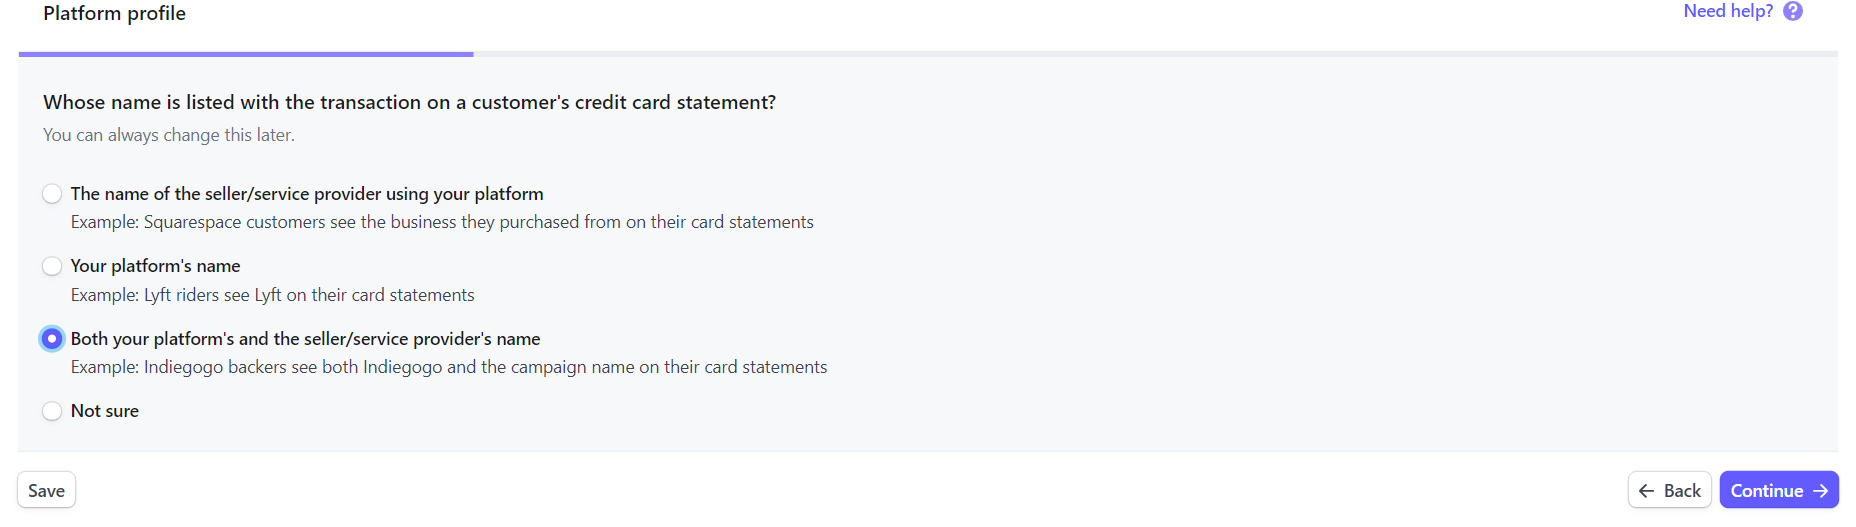
C. In the third section, select the option ‘Both your Platform’s and the seller’s name’:
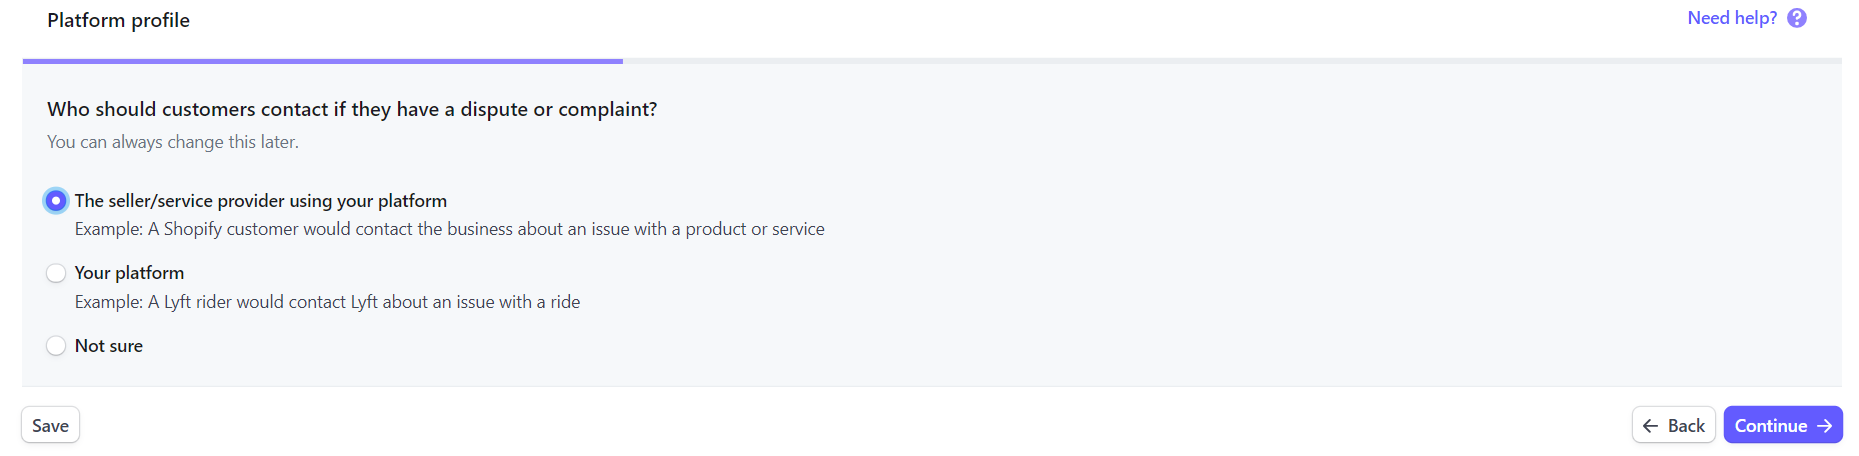
D. Next select ‘The seller using your platform’:
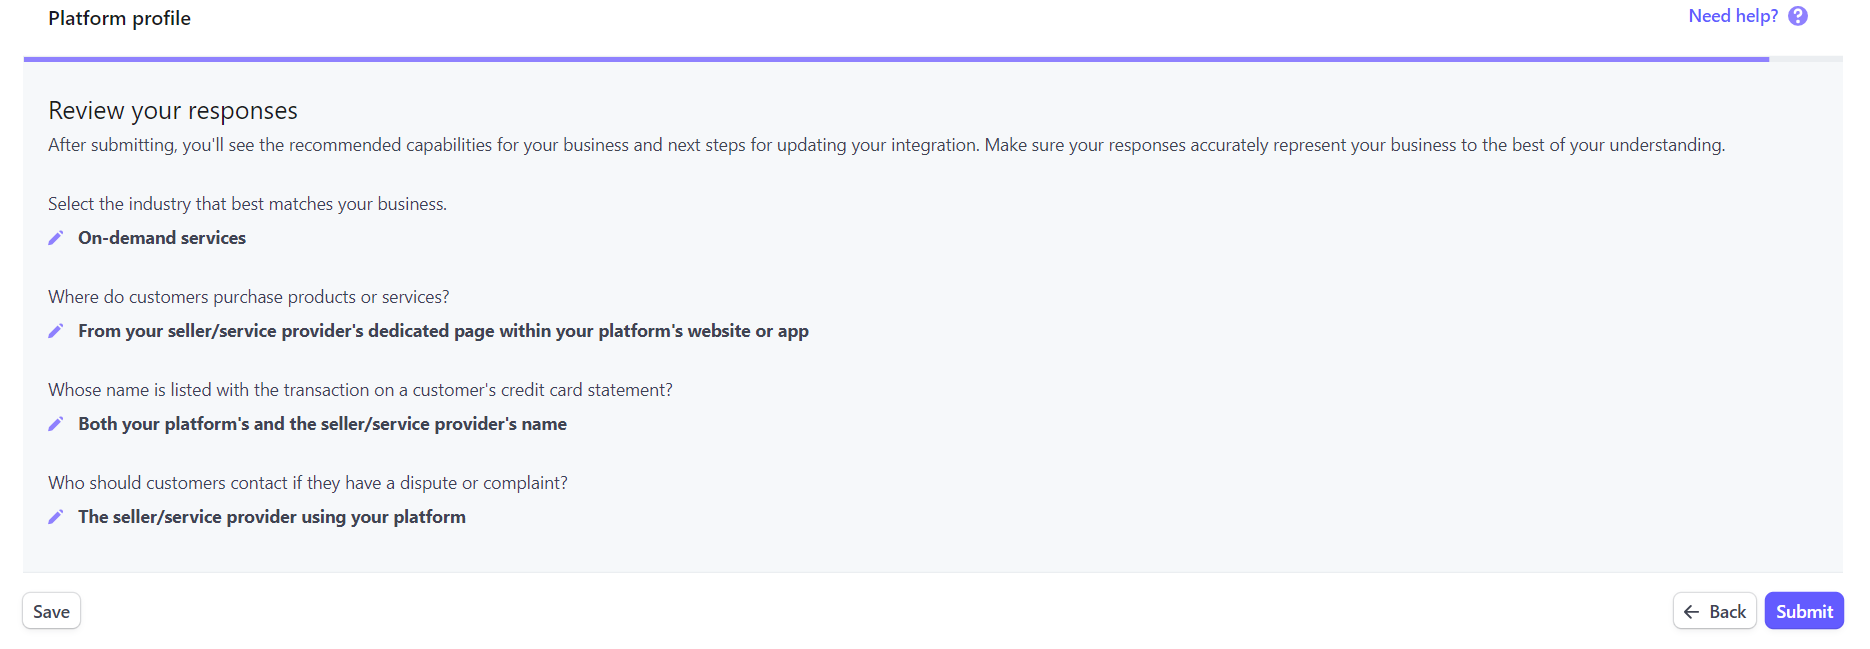
E. Review your answers and click ‘Submit’
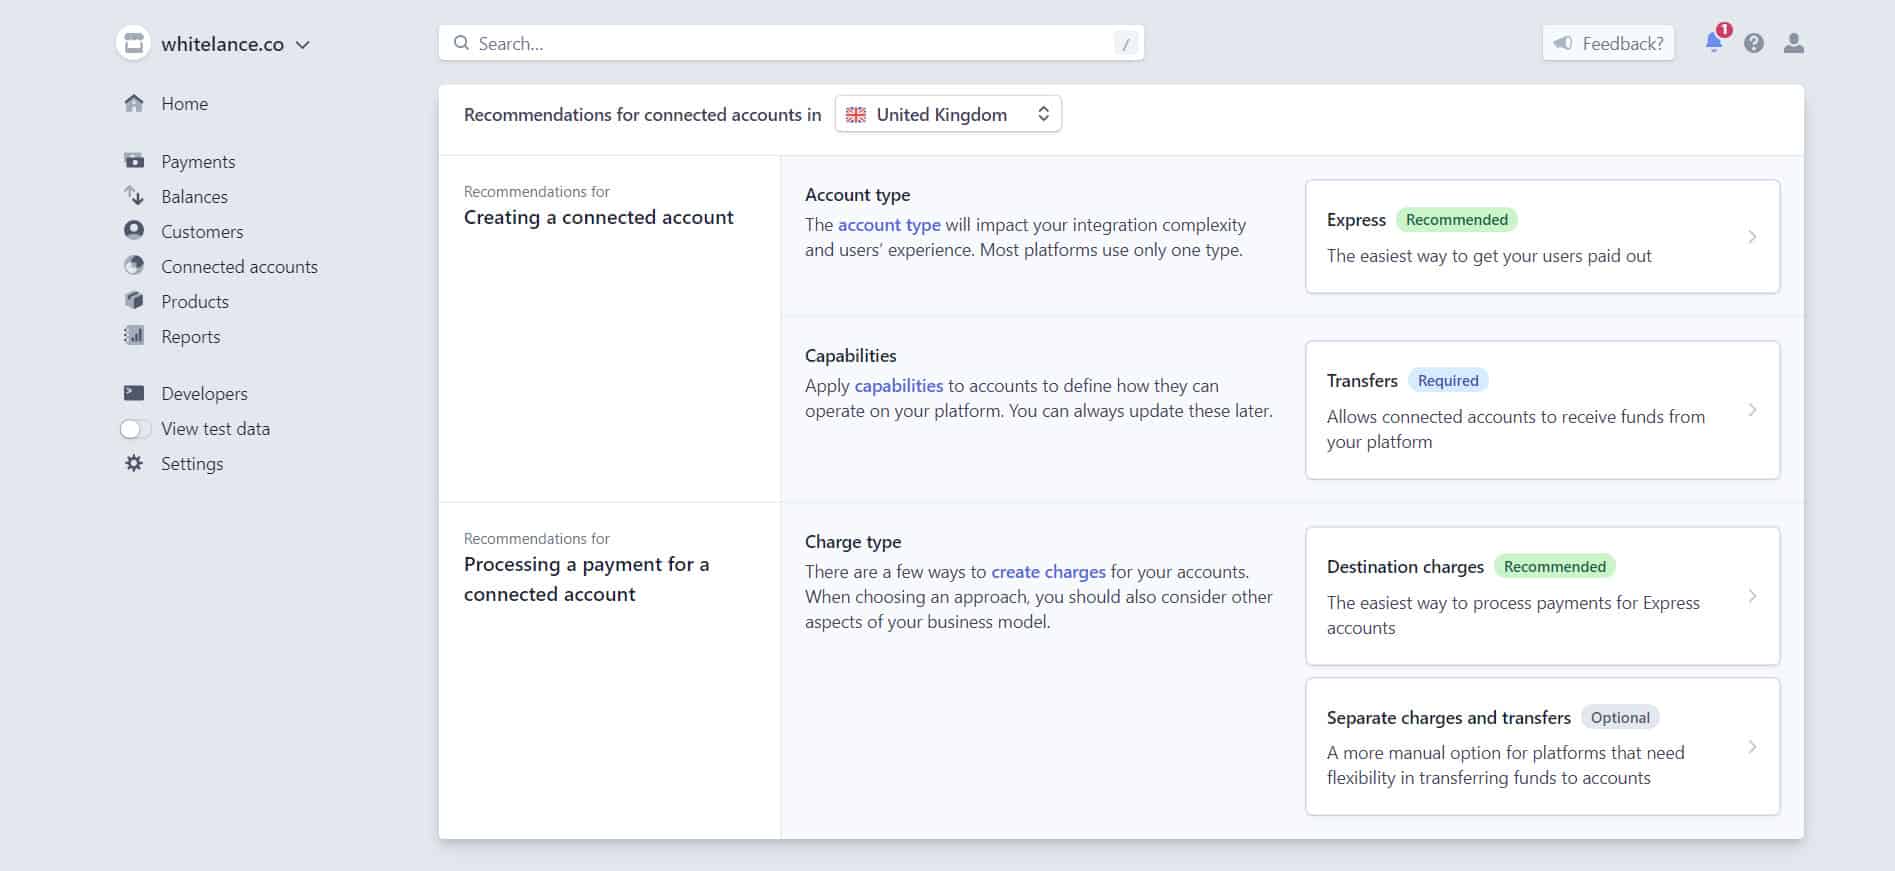
F. Stripe will offer you some recommendations. You can ignore these.
Update your Settings
A. Go to your settings page:
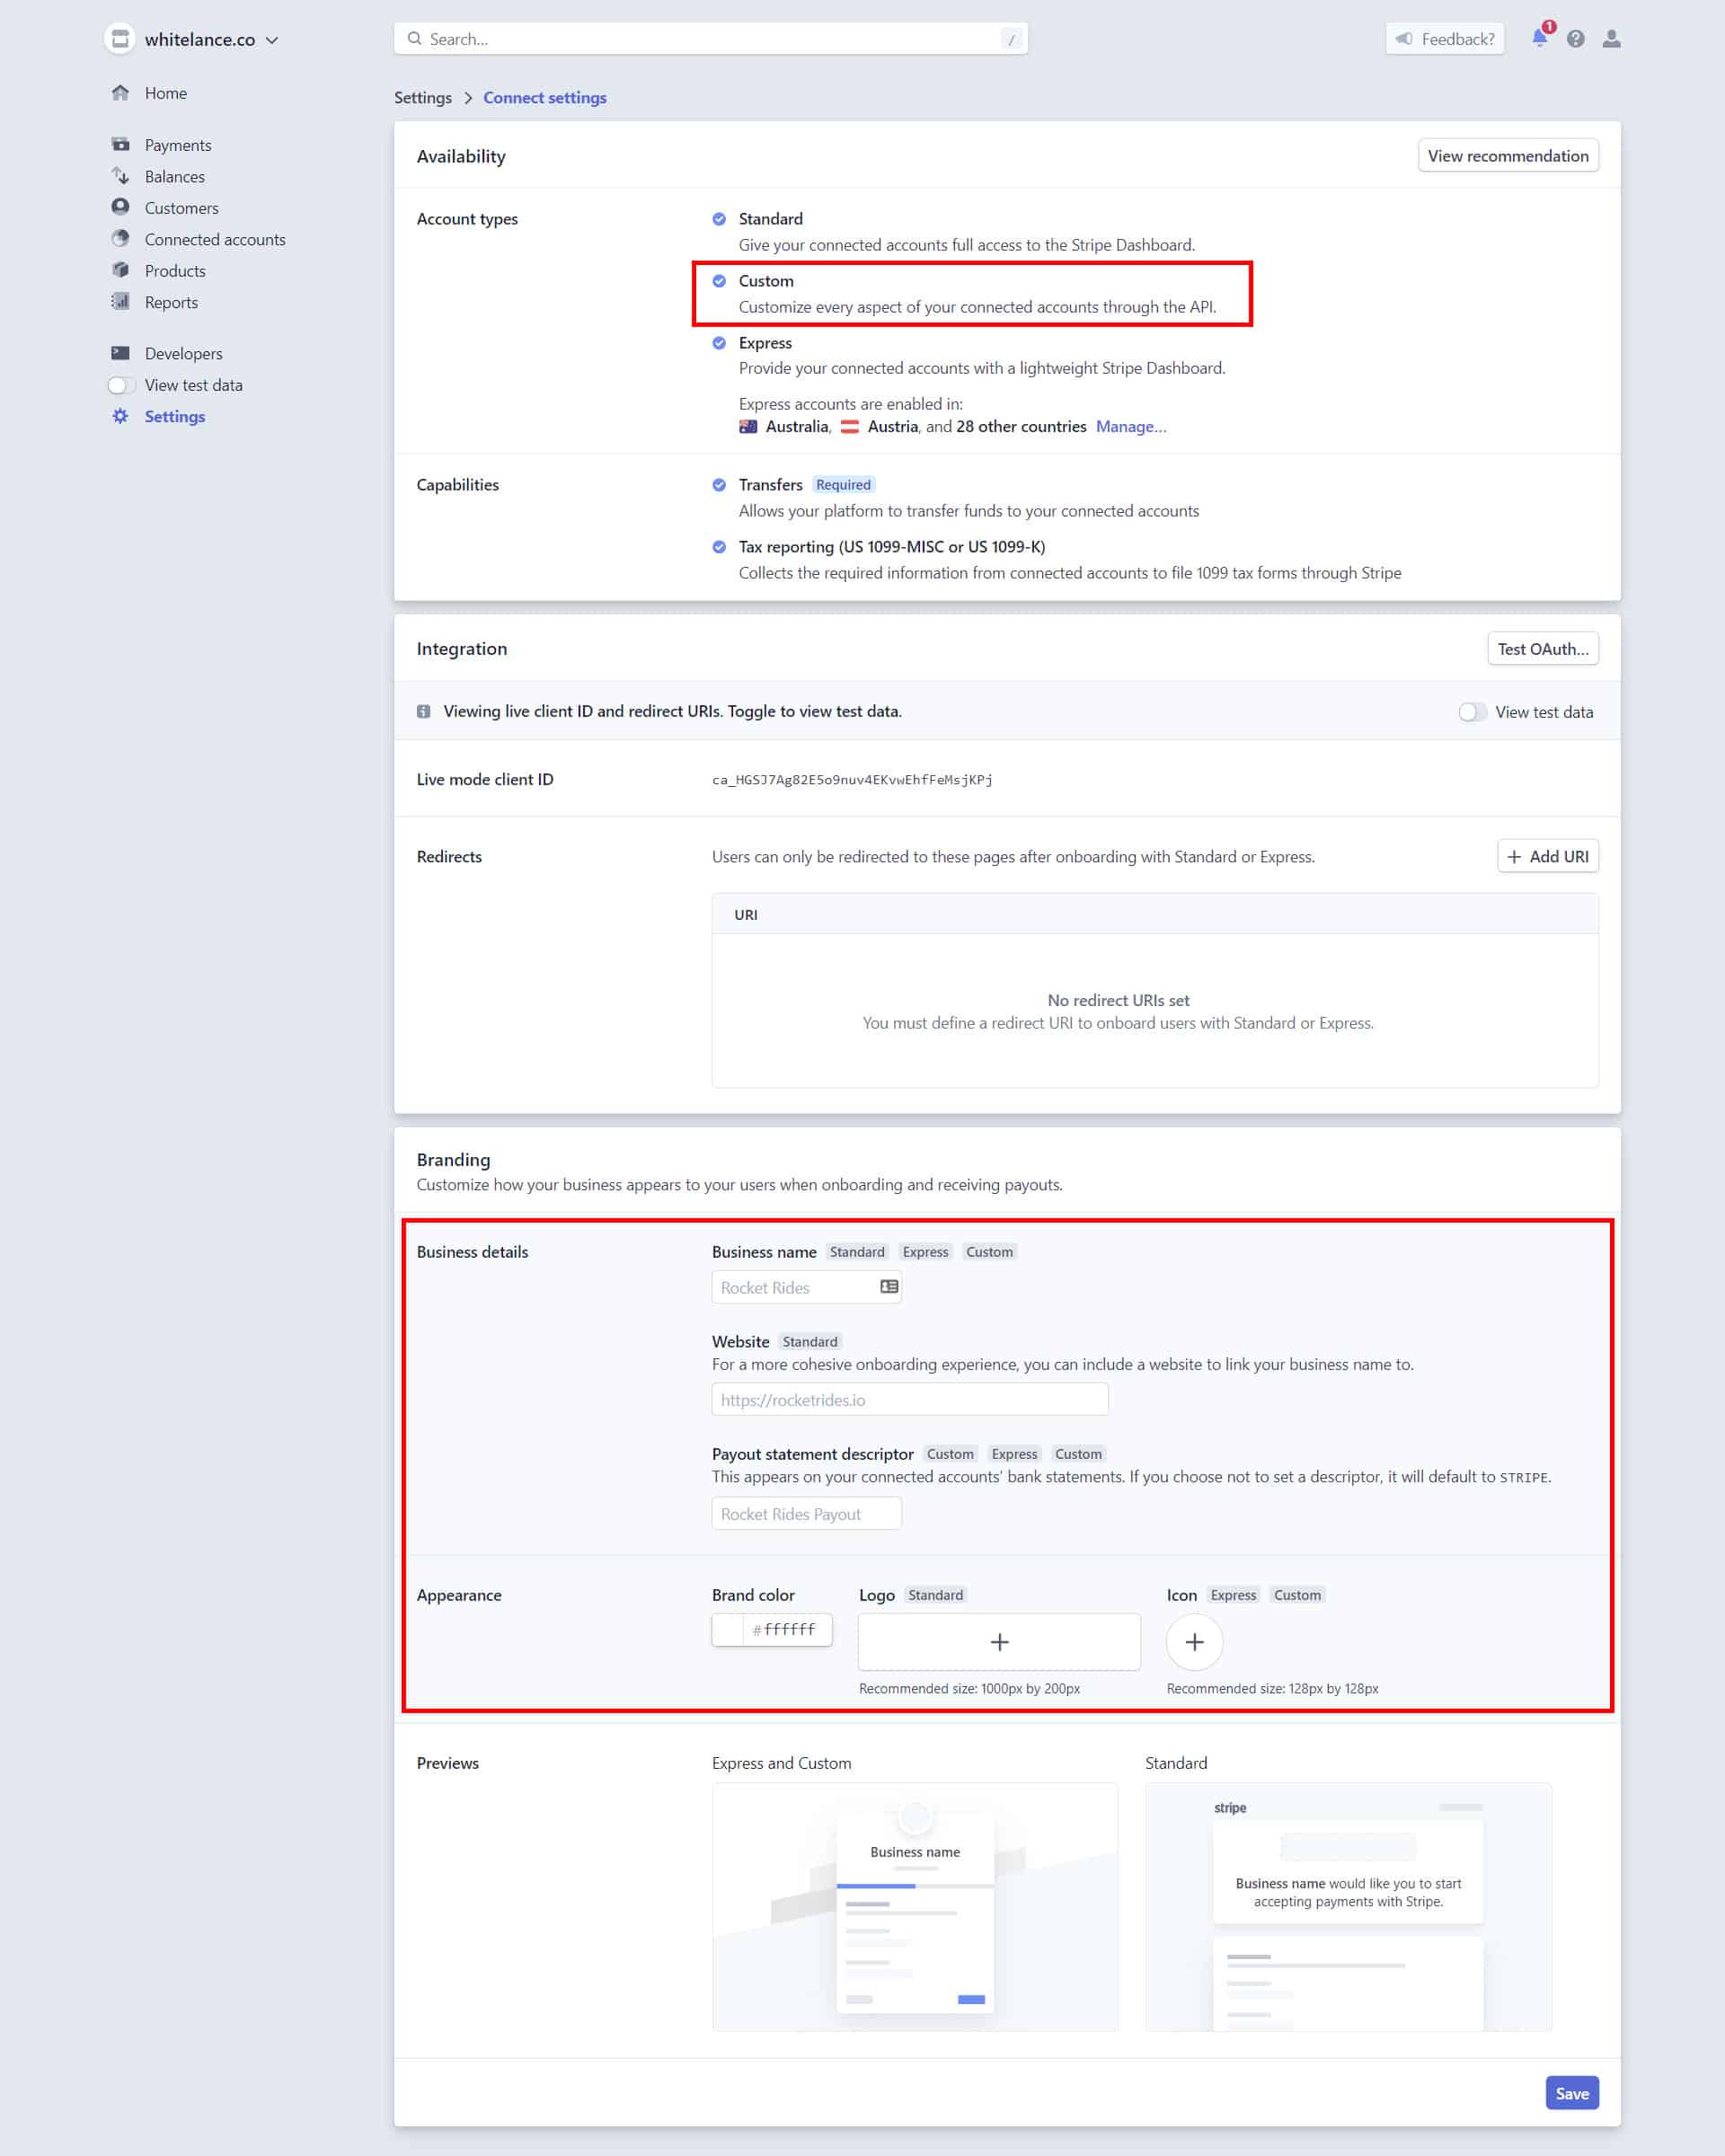
B. Check that Connect is enabled on your account and fill in your company information:
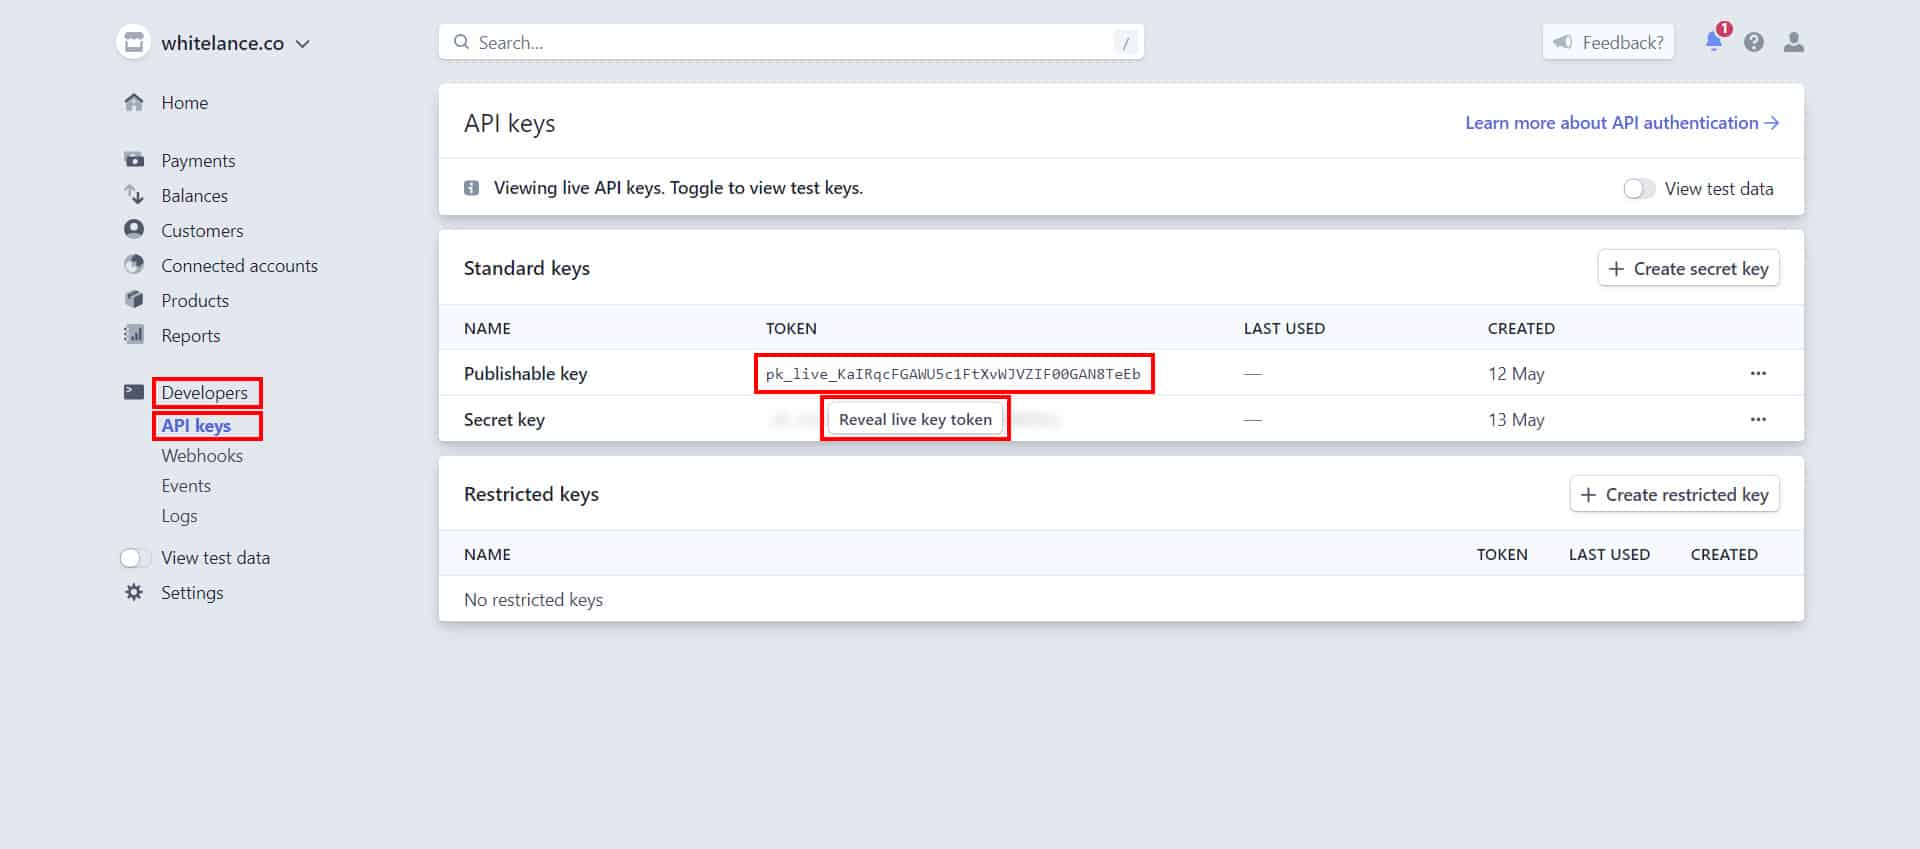
Find your API keys
Click on the menu item ‘Developers’, the on the sub-menu item ‘API keys’. You’ll need to copy both the Publishable key and the Secret key.
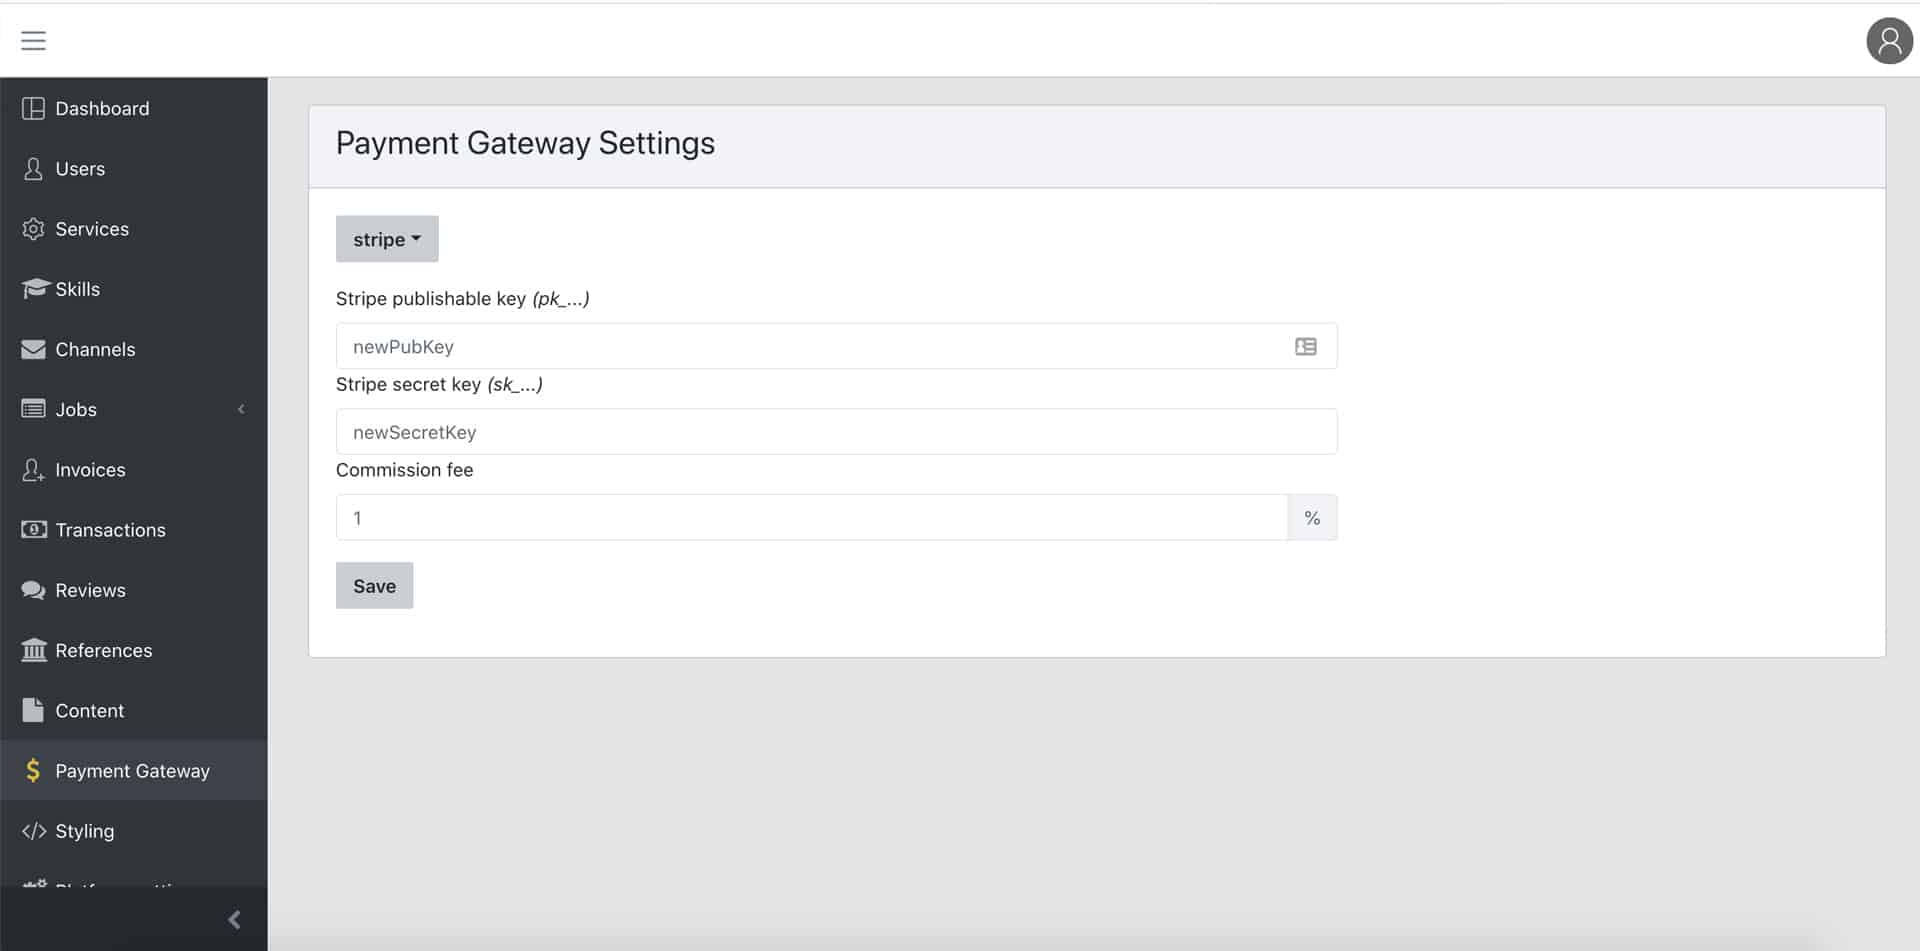
Add them to your Whitelance Dashboard
Paste the keys into the ‘Payment Gateway’ tab of your Admin Dashboard:
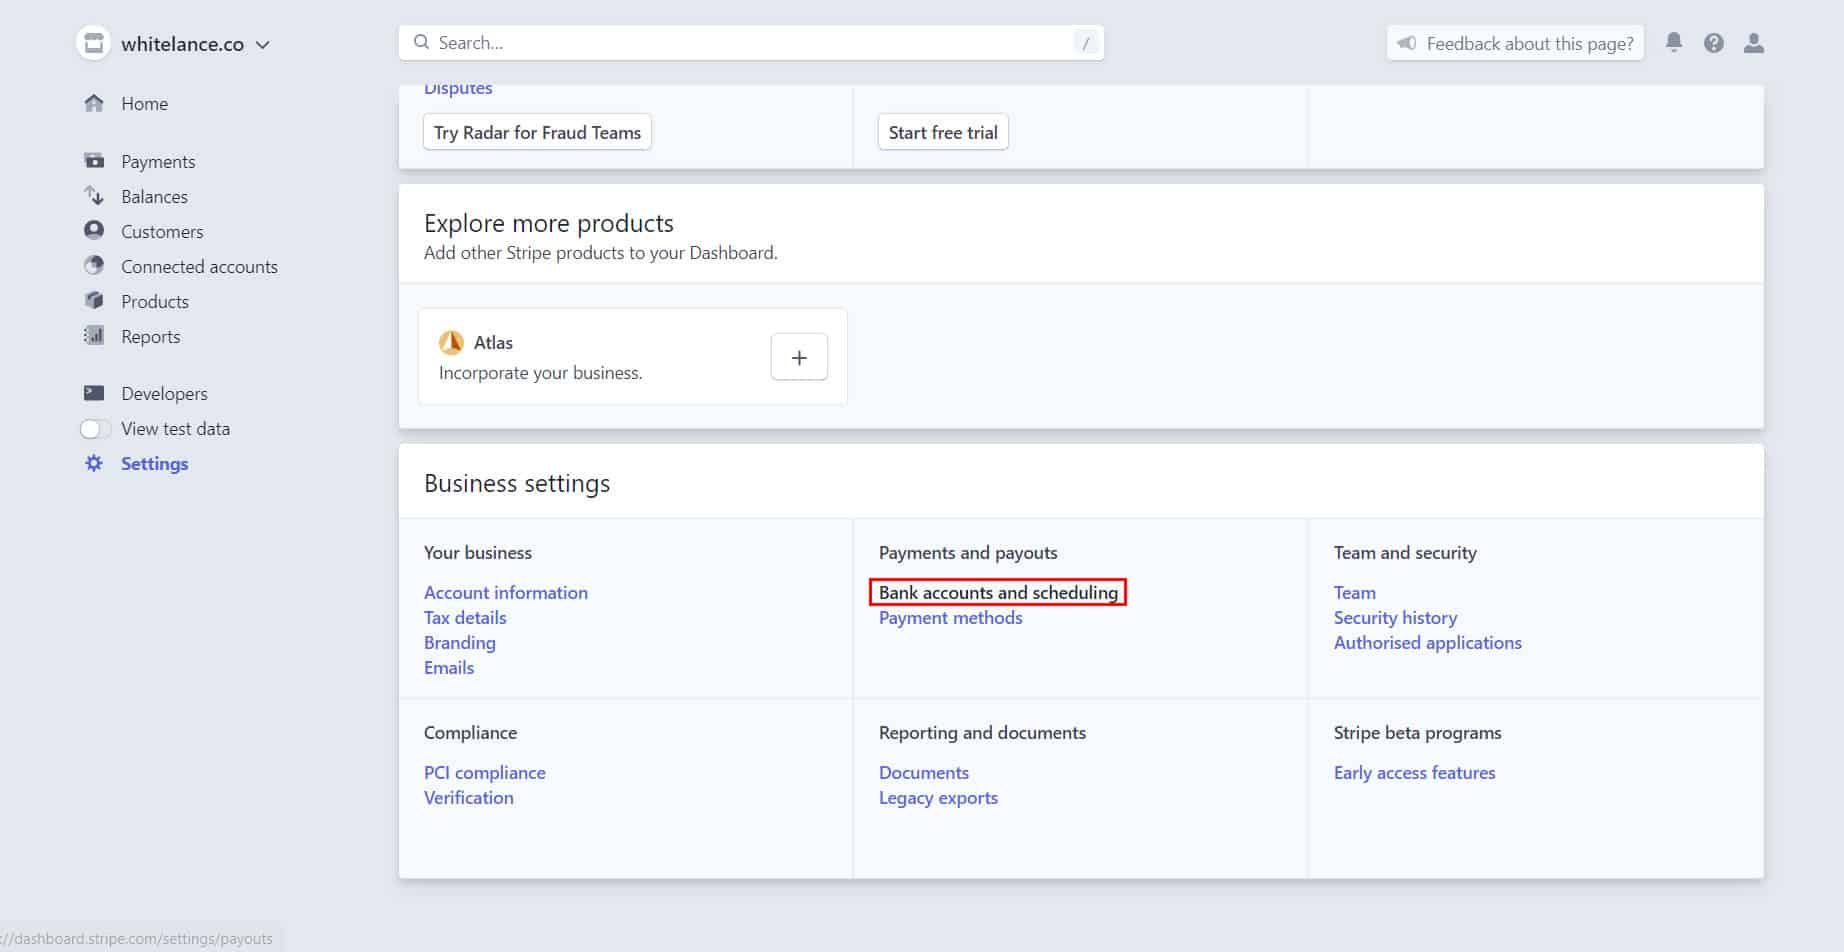
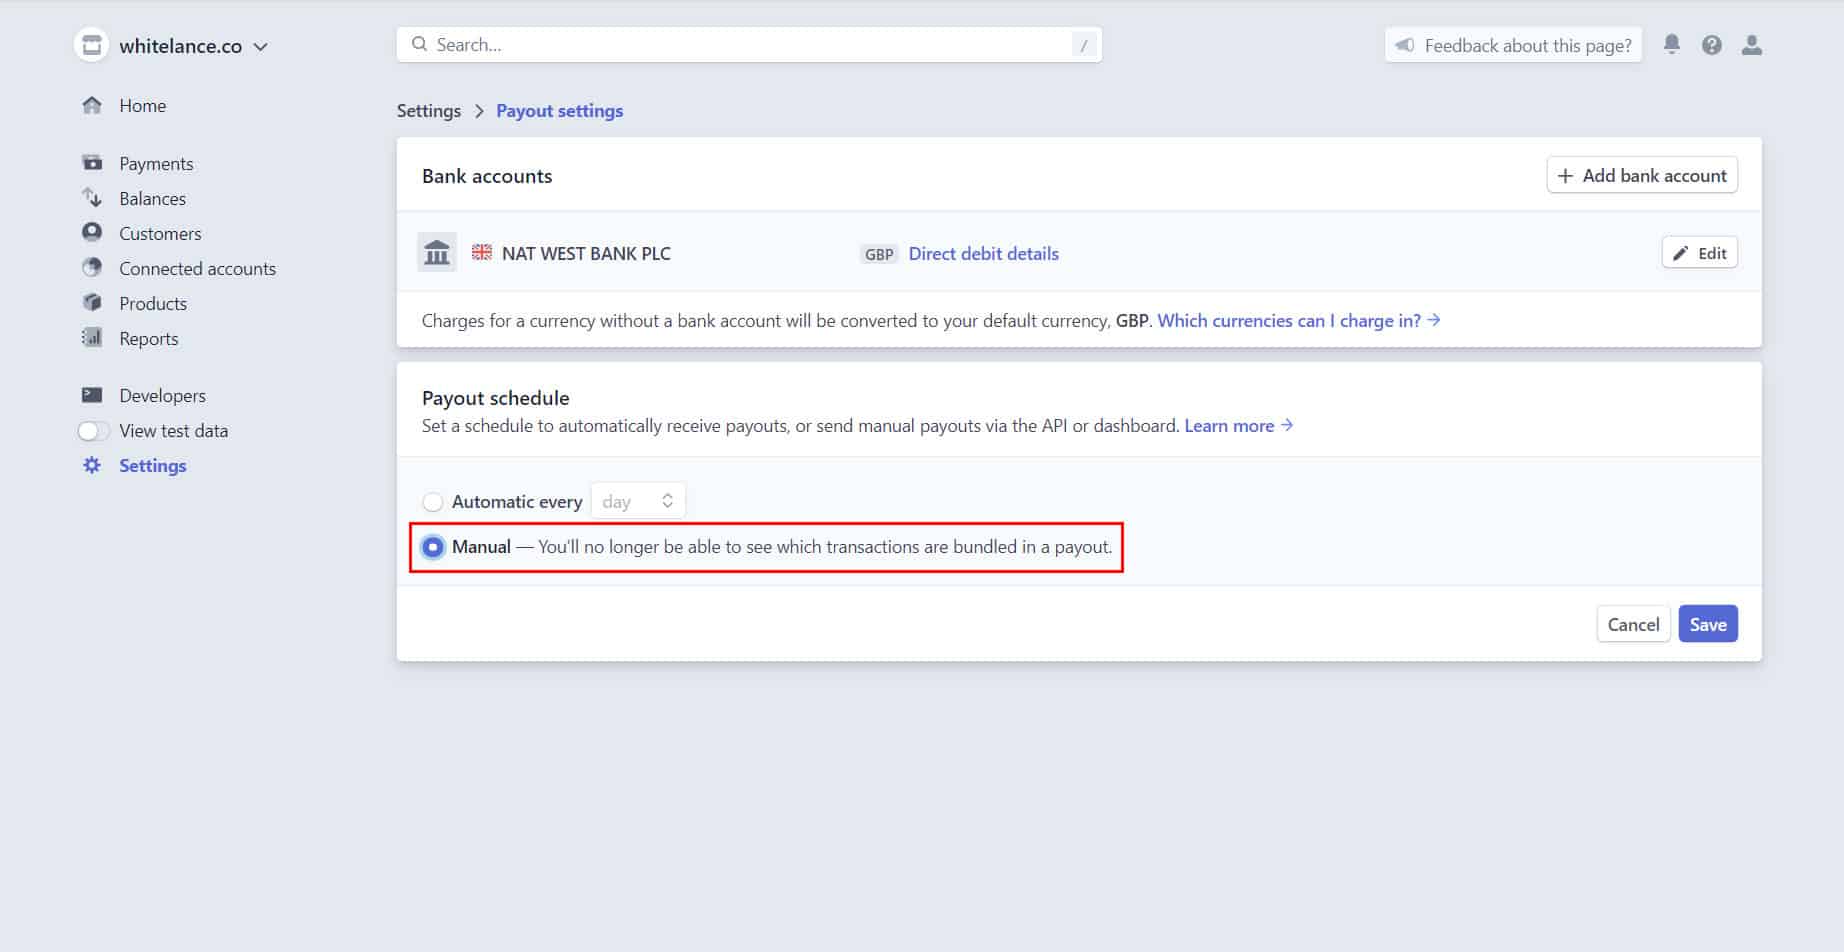
Enable Manual Payouts
Head over to your Settings page and click on ‘Bank accounts and scheduling’.
Switch from Automatic to Manual payouts.
Note that the Stripe setup on Whitelance powered marketplaces is ONLY a ‘Custom’ Connect platform and all Connected accounts are within this ‘Custom’ setup, meaning that your freelancers do NOT have access to Stripe at all and cannot change anything other than through your Whitelance-powered interface.
Done!
Congratulations, you’ve added Stripe to your marketplace. Give us a shout if you have any questions.